Wednesday, February 9, 2011

ORGANIZING EMBOSSING FOLDERS


I have a large collection of embossing folders. Provo Craft is pretty clever making them to match the cartridges! I cut cheap white card stock (Staples) into 4 1/4" x 5" pieces and embossed every folder. For some, that was the first time I used them (bad I know). I refuse to count how many I have! I used an acrylic file folder shaped mini album as the dividers. I did Seasonal, floral, Cut & emboss, Asian, words, borders and frames. It really helps when designing to look through the book quickly and then find the folder in the drawer. I have a six drawer plastic storage drawer unit right under my Cuttlebug and Big Shot that got organized and holds all my folders and die cuts.
The book measures 5" x 12". I covered back & front of both covers with paper. I used by new Distress machine from Zutter to distress the front cover. I got that for Christmas and this was the first time I used it, too much fun. I added some ink to the edges. Of course then the cover just begged to be embellished! It fits nicely in the top drawer for easy access.
I am doing well finding homes for all my stuff and keeping my desk clean. I clean up after each card or project and start fresh again. Even getting the scrap paper put away by color cleans up a large portion of the mess.
I am now working on my paper. So that will be my next post on organization.

Happy Cricut Crafting
Colleen

Saturday, February 5, 2011

NUMBER 9 BIRTHDAY

I have been busy making Valentine cards today but took a break to enter a color challenge over at More than Favors. These were nice colors to work with in the winter, a real lift to the spirits. I combined this with another challenge to use a number. These nice bright colors are perfect for my young great niece.
The number was cut from Mickey Font at 2", then embossed with the Swiss Dot Folder. The border was cut at 1 1/2" from Graphically Speaking. I used Accent Essentials to cut the three scallop circles. I used the shift of the image on page 62. Blue at 3 1/2", yellow at 3 1/4" and pattern paper at 3". The whole scallop piece is attached with pop dots.


Details:
Card - 5" x 5" Bazzill Swiss Dot
Pattern Paper - K & Company (Lemon Drop)
Card stock - Bazzill Smoothies (blue & yellow)
Embellishments - flower & brad, Swiss Dot embossing folder

Challenges:
Alphabet Challenge - N is for Numbers
More than Favors (Wacky Wednesday) - #24 Color challenge (blue, white & yellow)
Hop over to the two challenge blogs and check out the rest of the entries. It is a great way to find new blogs to follow. I hope you will be one of my followers.

Happy Cricut Crafting
Colleen
SMACK - Kisses for you

This weekend is a busy one with two hockey games but next week is even busier with a meeting every night. So I needed to get busy with my posts before the challenge deadlines come along. This is the first time I used my Indie Art cartridge - so much fun. The "SMACK" shadow was cut at 2 1/4". The Lips shadow cut at 1 1/2". I used a clear Sakura gelly roll pen for the lip gloss. On the inside the pattern paper and the lips were repeated the a piece of the Quartz stamped with Happy Valentine's Day.

Details:
Card: 4" x 8 1/2" use a #10 envelope
Pattern Paper: Basic Grey Eskimo Kisses 3 3/4" x 8 1/4"
Card stock : White, Quartz & Rhubarb Bazzill
Embellishments: gems

Challenges:
Paper Cutz Challenge - Valentine LO, Card or project without using hearts & any color
Flaunt it Friday - Indie Art cart using the lips

Have a great crafting weekend if you can and enjoy time with your family. Our daughter and son-in-law live 500 miles away from us, unfortunately, but we look forward to our weekly phone on Sunday.

Happy Cricut Crafting
Colleen
Friday, January 28, 2011

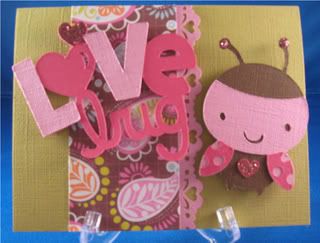
LOVE BUG

It's the weekend and we don't have hockey games to go to so that means more time for crafting. I have five female birthdays in February I need to get ready plus some Valentine cookies to make.
I am really enjoying the challenge blogs I have been finding. There are thousands of creative minds out there churning out fantastic object 'd art every week. I find now it is also a bigger challenge trying to combining challenges to come up with one idea. On this card the colours, the theme and the cartridge were chosen making it so much easier to come up with an idea. I love how it turned out and I hope my great niece will too.
The ladybug and Love Bug title are on page 66 of Create a Critter. Both were cut at 3". I cut the shift layer of the words and cut the "l" and "v" off. The inside of the card has a piece of pattern paper and heart border to match the front.

Details:
Card - A2 Cardstock - Bazzill & Colormates
Pattern Paper - 8x8 Sweet Blooms by Colorbok
Embellishments - Stickles (pink)
Punch - Fiskar heart border
Cartridge - Create a Critter

Challenges:
Wacky Wednesday #23 - brown, green, pink
Cricut Cardz Challenge #59 - child's Valentine card any cartridge
Cricut Cartridge Chaos Challenge #3 - Create a Critter

Enjoy your weekend!!!
Happy Cricut Crafting
Colleen
Thursday, January 27, 2011

CHALLENGES

This project fits the criteria for two challenges this week. Over at Paper Playtime #35 challenge was anything party related. At Scrappy Moms Stamps, Terrific Tuesday the challenge was to use the "Sweethearts" cartridge.
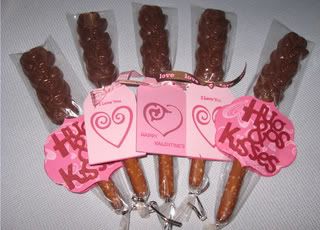
I am so excited!!! A client of my husband gave us hockey tickets to see the Vancouver Canucks play the Calgary Flames on Feb. 12th. This will give us a chance to visit my three nephews and their families. So a party needs favours and chocolate is always a hit.
The mold used to make the pretzel stick topper is by Wilton. I bought everything, including the pretzels, at my local Michael's. I used Light Cocoa candy melts.
The tags were cut using the TAG "feature key" and two hearts shapes (pg 34,35). Both cut at 3". The tag "foundation key" (pg 79) was also cut at 3".
The Hugs & Kisses tag was made using the "cartoche" on page 74. To manipulate the image I used my Gypsy and changed the size of both the width & height to 3.45w by 2.94h. To do that the width and height have to be unlocked by clicking on the chain image. This allows the proportions to be altered. The words Hugs & Kisses on page 36 were cut at 2 1/4". The pink paper on the cartoche was stamped with white Colorbox pigment ink.
The best part about making these was the taste test. Someone had to eat the broken pretzels and leftover chocolate! YUMMY.
Please leave a comment telling me which tag you like best.

Happy Cricut Crafting
Colleen

Monday, January 24, 2011

ORGANIZING CRICUT CARTRIDGES


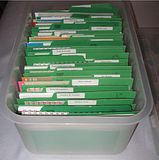
There are lots of people on the web showing their cartridge storage ideas - here is mine. I use my Gypsy or Design Studio mostly so I don`t use the overlays and books a lot. I store my carts in three plastic storage buckets in alphabetical order. I store the overlays and books in two Sterlite Snap Lid containers. The folders are cut from office file folders - 2 per folder. The labels are made on the computer. I remove the French and German pages from the books so more books fit per container.
I purchase the cute Cricut backpack on wheels so when I teach classes everything fits nicely in there. It holds all my Cricut carts, my Gypsy and all it`s cords, Cricut colors & gel pens and tool kit.
I am still cleaning and re-arranging my studio. My paper mound is the next stop. If you have any helpful ideas please leave a comment.

Happy Cricut Crafting
Colleen

Sunday, January 23, 2011

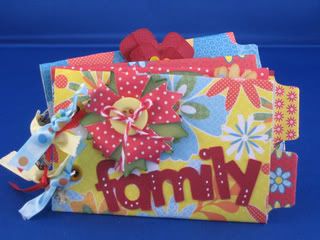
TIOLET PAPER MINI ALBUM


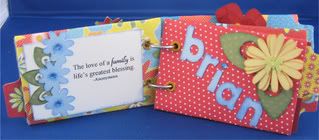
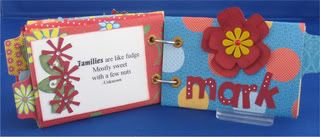
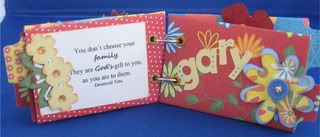
I am teaching a beginners Cricut class and this is the project this week. These are really fun to create and make great gifts. The flowers, borders and leaves are all from Walk in My Garden. The lettering is Mickey Font. The tab on the inserts is a SU punch.
To squash the TP rolls easily, run them through the Cuttlebug. Cover each roll with a 4" x 6" piece of pattern paper. Using a Cropidile punch two holes close to one edge.Make a cardboard template so each page is the same. Set eyelets and put on binder rings. A Bind it All could also be used with a large O wire.
Select any four flowers and make between 1 1/2" to 2" tall. Numerous layers are required for some of the flowers. Cut a piece of cereal box or chipboard for the back of the flower used for the front cover. This makes it more durable. Ink edges, add gems, buttons and brads. The one inch border flowers and leaves are made by using the Border Feature key.
The verses were printed from the computer and the edges inked. Stamps could also be used. Journaling stamps with handwritten info could also be used. Hope you will give these a try.

Happy Cricut Crafting
Colleen
 

lawsuit loans