Showing posts with label Plantin. Show all posts

Sunday, January 16, 2011

CRICUT CARDZ CHALLENGE #57

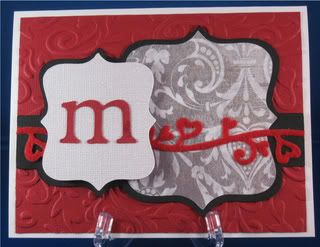
I am battling a sour throat and cough today so not much going on today. Laptops are great, they can come to bed with you! I made this card for my nephew's wife, Michele, who's birthday is in February. That's the good thing about participating in challenges - getting cards made ahead of time.
This is my entry for the red, white & black colour challenge at Cricut Cardz Challenge.
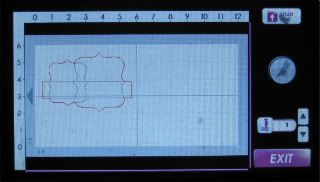


I used my Gypsy to manipulate the Marquee1 shape from Storybook (pg 66). Unlock the width & Height and change to -Large 3.5H 3.25W
Small 2.75H 2.5W
Using Plantin make a rectangle 1H x 5 1/4W. Weld these three shapes together. This makes a one piece mat.
The layers of white bling and pattern paper were cut 1/4" smaller both height and width. The red Pomegranate Bazzill background was embossed with a Sizzix folder from the Floral Flourishs and Vine set. The letter was sized by putting it inside the mat and using the size up button and increasing it until it looked good.


Details:
Card Size - 4 1/4 x 51/2
Cart - Storybook
Card stock - white, pomegranate, white bling Bazzill, Deep Heritage Black colormates
Pattern Paper - Basic Grey Black Tie (Ventana)
Embellishment - Mini felt fusion by Queen & Co.

This was fun and I like the colour scheme
. It is funny how we get stuck in a rut buying the same colours and only working within our comfort zones. Be brave and try a different colour. It is not life threatening, trust me,

Happy Cricut Crafting
Colleen

Tuesday, January 11, 2011

CRICUT CARDZ CHALLENGE


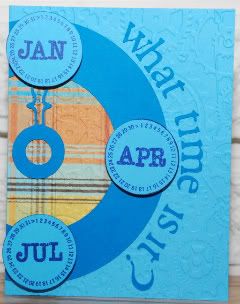
So far my resolutions are going okay. I have submitted my first challenge entry to Cricut Cardz Challenge. Every Wednesday a new challenge is posted. This past week's challenge was a New Year's card with a clock image from any cartridge. My nephew Mark's birthday is in January so I made this for him. This also helps out on my resolution to get cards out to family & friends on time. His birthday is the 24th. If you look closely I have circled the 24th on the January stamped image.


Details:
Carts - Happily Ever After (clock), Plantin (letters & circles)
Stamps - Close to My Heart (calendar circles) Cloud 9 (inside verse)
Cardstock - Colormates
Pattern paper - Pet stack DCWV
Embossing folder - Clockworks

Hope this inspires you to try a challenge yourself. Wednesday Jan 12th is the next one at Cricut Cardz so check it out. I will post some more challenges links next time.
Happy Cricut Crafting
Colleen
Monday, October 26, 2009

Christmas Bag Topper


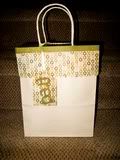
This bag topper is an old idea resurrected to be cut with the Cricut. For Christmas this year I am making "Soup in a Jar" as gifts for about a dozen people and needed a durable way to package them. I will be also be putting other smaller things in the bag. I wanted to be able to cut lots out quickly so it is just the right task for my trusty Cricut. If you leave a comment or and questions concerning the project, with your email address, I will send the cut file. This pattern works on 8" wide by 4 1/2" deep bags from M's.


INSTRUCTIONS:

Use two sheets of co-ordinating paper or two double sided papers of the same design.


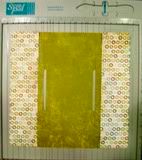
If the paper has a directional design, such as words, cut the 12 x 12 into 6 x 12 for the cutting of the scallop fringes and cut it twice. If the paper has an allover non directional pattern, cut once, turn mat and cut again.


BAG TOPPER

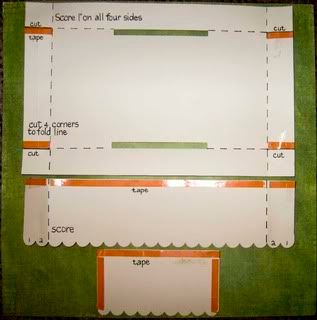
Score 1" from all 4 sides on the bag topper. Adhere tape to 4 edges (see red on diagram). Cut where indicated.
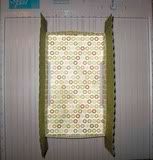
Score both longest scallop fringes two bumps from each end. Adhere tape along straight edge in three pieces (this makes folding easier).
Adhere tape to sides and top of short scallop fringe pieces.


On the bag topper mark a line 1/2" from the edge to line the fringe against. Peel only the middle piece of tape on the fringe and attach to the topper. Repeat with the other long piece of fringe.


Remove protective covering on tape on the 4 cut lines on the bag topper. Fold tabs to inside and adhere.


Fold the scallop fringe around all 4 corners and adhere.


Adhere side scallop fringes along the top first and then overlapping the bumps neatly, adhere sides.

Adhere Merry Christmas to front of bag. Put topper on for placement. A little tip for gluing. I use an old phone book. Each time I glue something I flip the page so your work area stays glue free.

TAG

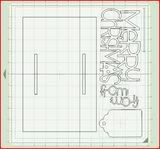
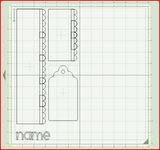
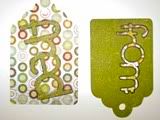
On the fringe Screen Shot(fig. 2) where it says name, delete that and put in your own special person. I used Simply Sweet Alphabet and welded it. Make sure it fits the tag. The tag on the bag topper Screen Shot is just extra & smaller. Didn't want to waste paper. After I glued on the name and From:, I outlined them with black pen to make them stand out more.


I will post another picture when I get all the bags done. It is fun experimenting with different colour combinations. Hope you have fun making some of these. I made the soup this weekend to make sure the recipe was good and my husband thought it was delicious. I do nice things like that because he does all the editing of my pictures before I upload them.
Cheers Colleen
 

lawsuit loans