Sunday, January 16, 2011

CRICUT CARDZ CHALLENGE #57

I am battling a sour throat and cough today so not much going on today. Laptops are great, they can come to bed with you! I made this card for my nephew's wife, Michele, who's birthday is in February. That's the good thing about participating in challenges - getting cards made ahead of time.
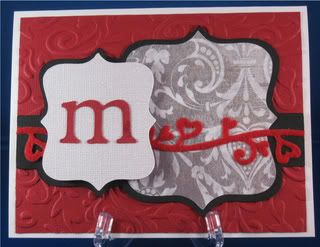
This is my entry for the red, white & black colour challenge at Cricut Cardz Challenge.
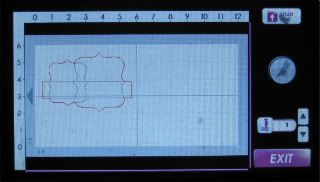


I used my Gypsy to manipulate the Marquee1 shape from Storybook (pg 66). Unlock the width & Height and change to -Large 3.5H 3.25W
Small 2.75H 2.5W
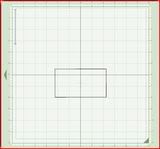
Using Plantin make a rectangle 1H x 5 1/4W. Weld these three shapes together. This makes a one piece mat.
The layers of white bling and pattern paper were cut 1/4" smaller both height and width. The red Pomegranate Bazzill background was embossed with a Sizzix folder from the Floral Flourishs and Vine set. The letter was sized by putting it inside the mat and using the size up button and increasing it until it looked good.


Details:
Card Size - 4 1/4 x 51/2
Cart - Storybook
Card stock - white, pomegranate, white bling Bazzill, Deep Heritage Black colormates
Pattern Paper - Basic Grey Black Tie (Ventana)
Embellishment - Mini felt fusion by Queen & Co.

This was fun and I like the colour scheme
. It is funny how we get stuck in a rut buying the same colours and only working within our comfort zones. Be brave and try a different colour. It is not life threatening, trust me,

Happy Cricut Crafting
Colleen

Friday, January 14, 2011

BABY CARDS

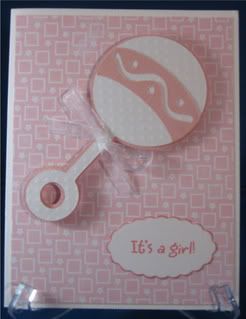
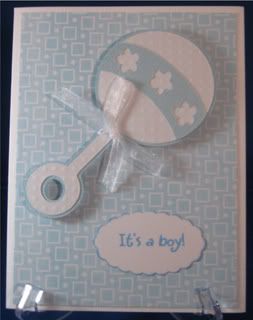
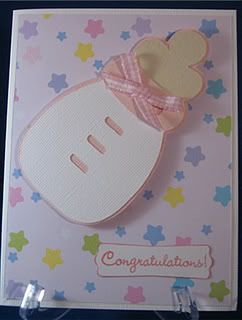
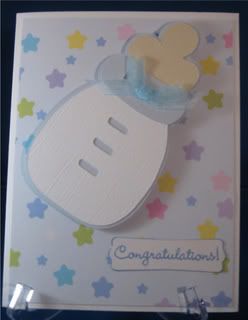
The Children's pastor at our church was looking for someone to make baby cards for the new arrivals. Guess who volunteered! They were fun to make.


This is the kind of project when I love to use my Gypsy. By using the Gypsy or Design Studio you can quickly figure out the number of bottles or rattles that will cut per page. The shadow of the rattle and the band are the same colour, so by arranging them all on the same page on the Gypsy it is easy to be economical with your paper.

Details:
Card Size - 4 1/4 x 5 1/2
Cart - New Arrivals
Base of card - Bazzill
Cricut cuts - Rattle 4'' & Bottle 4" all Bazzill, the top of the rattle - Swiss Dot Bazzill
Punches - SU scallop oval and label
Pattern Paper - unknown, Mat size is 4 x 5 1/4
Ribbon - sheer & gingham
Ink - SU and Chalk


Happy Cricut Crafting
Colleen
Wednesday, January 12, 2011

HOW TO ENTER BLOG CHALLENGES

This week I have been spending a lot of time blog hopping looking for blogs that had challenges on them. After submitting my first ever challenge entry, I was buzzed and left wanting to find out more about the whole process. Then I thought it might be a good topic of a post for those of you that are still "Challenge Newbies".
Each blog usually has a Design Team that post their entries when the challenge is issued as inspiration. Here are a few I found - there are lots more.

Days the challenges are issued:

MONDAY- Fantabulous Cricut deadline is Sunday midnight. Any paper craft item. Prizes are drawn by random.org . The 4 weekly winners are entered for a monthly grand prize.
MONDAY - Paper Playtime deadline is Saturday midnight. Any paper craft item. Prizes are weekly from various sponsors. Winners must have USA mailing address. (Friends or Relatives will come in handy here).
WEDNESDAY - Cricut Cardz Challenge deadline is Monday midnight. Card challenge only. Prizes are drawn by random.org . The 4 weekly winners are entered for a monthly grand prize.
WEDNESDAY - Wacky Wednesday deadline is Monday midnight. Any paper craft item. Prizes are drawn by random.org
FRIDAY - Paper Cutz Challenge deadline Thursday midnight. Any paper craft item. Prizes are drawn by random.org . The 4 weekly winners are entered for a monthly grand prize.

Rules for entry:

Post your picture to your blog or email it to them. On the blogs there is either a "Mister Linky" or "Add your link" blue key to push and then fill in the information. Some have other criteria to follow and it is listed at the bottom of the challenge post.

As people enter their projects a list forms at the bottom of the post. Click on their name and it will take you to their blog. It is a great way to surf and see lots of creative blogs.

Prizes:
Each blog announces the weekly winner on their blog. They do not contact the winner so you have to keep track and then reply with an email.

I hope this takes some of the mystery out of how to post a challenge entry and I want to encourage you to give it a try.

Happy Cricut Crafting
Colleen
Tuesday, January 11, 2011

CRICUT CARDZ CHALLENGE


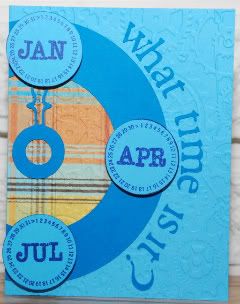
So far my resolutions are going okay. I have submitted my first challenge entry to Cricut Cardz Challenge. Every Wednesday a new challenge is posted. This past week's challenge was a New Year's card with a clock image from any cartridge. My nephew Mark's birthday is in January so I made this for him. This also helps out on my resolution to get cards out to family & friends on time. His birthday is the 24th. If you look closely I have circled the 24th on the January stamped image.


Details:
Carts - Happily Ever After (clock), Plantin (letters & circles)
Stamps - Close to My Heart (calendar circles) Cloud 9 (inside verse)
Cardstock - Colormates
Pattern paper - Pet stack DCWV
Embossing folder - Clockworks

Hope this inspires you to try a challenge yourself. Wednesday Jan 12th is the next one at Cricut Cardz so check it out. I will post some more challenges links next time.
Happy Cricut Crafting
Colleen
Tuesday, January 4, 2011

HAPPY NEW YEAR 2011

After a long absence I am returning with full enthusiasm and creativity. I hope you and your families enjoyed the Christmas season as much as ours did. My daughter was on my case about my blog and selling my stuff so that is what prompted me to return.

I don't usually make resolutions but this year I did.

1. Make my blog a priority and post regularly
2. Make a project from each of my 73 cartridges
3. Better organize my craft space
4. Enter one challenge a month and post my entry (scary)
5. Get birthday cards to family & friends on time
6. Sell some of my projects

This is a big list of "to do's" but I am going to give it my best shot.

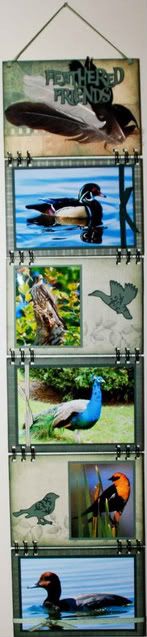
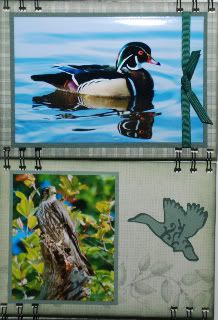
This first project was made for my husband for Christmas. I took an online course through My Creative Classroom to learn more about my Bind it All Machine. I highly recommend this course. By binding only four rings on each edge makes the project both lighter and uses up leftover pieces from other projects. My husband is an awesome photographer and I wanted to make a frame we could hang in our motor home. If this falls off the wall it won't break!

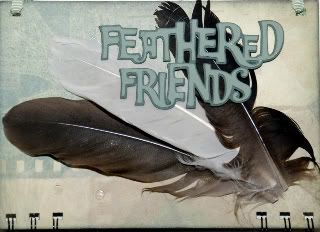
I used six 5 x 7 chipboard pieces and covered them with paper. Bind only on the edges. I choose to cut two of the pictures down to let the pattern paper show and have a space for the two Cricut cuts from Give a Hoot. The backs were inked.(No birds were hurt in the making of this frame.) I have a large collection of feathers. I will be making more of these in different themes, look for further postings.
My next blog will be about things I have done to organize my Bind it All, embossing folders and Cricut books & overlays.


Happy Crafting,
Colleen

Sunday, January 17, 2010

VALENTINE WREATH

HAPPY NEW YEAR
I made a New Year's resolution to post more often but apparently 2010 moves as fast as 2009 did. Two weeks have gone by and no post. Exciting news though, I got a Gypsy for Christmas. I must say bravo to Provo Craft this time for having a good user manual unlike when they released Design Studio. I am also excited about having the two cartridges included on the Gypsy. I also just ordered Pagoda & Ashlyn's Alphabet so am eagerly awaiting their arrival.
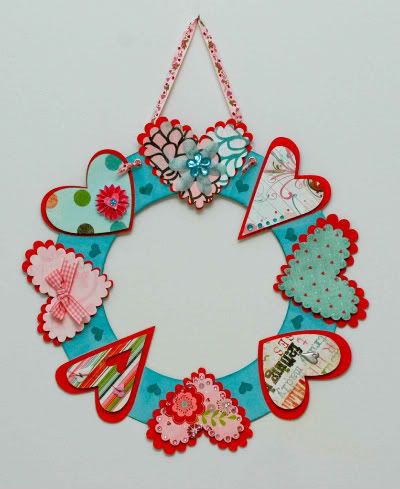
The base of the wreath is made by cutting a circle within a circle. Using the Center Point button move the blade assembly to the middle of the paper. The LED screen will show 6 by 6. Select circle cut at 6 1/2" size. When the cutting is finished the blade returns to the middle of the circle. Change size to 10", select Repeat Last and Cut. Now you have a base to attach the hearts to. I also cut a base out of a cereal box to give it more strength. I inked the edges of the wreath and added some stamped hearts in the contrasting color. Use as many different heart shapes as you have and layer as much as you want. Embellishments are only limited to your imagination. I hung my wreath with ribbon by putting an eyelet on either side of one heart and knotting the ribbon on the front.

Monday, December 14, 2009

Tri-Pocket Cocoa Card


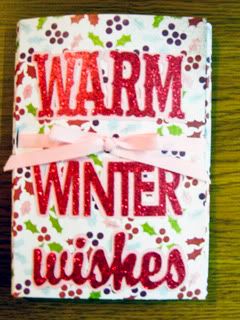
I made a dozen of these fun cards. I had friends over for a Christmas lunch last Wednesday and made these cards for them. They were very impressed. I made a cut file for this just to save time with the cutting. It can be cut by hand just as easy. I just don't like to do all the measuring on each card.


Cut double sided cardstock 8" x 12" and cut out rectangle by Cricut or by hand.


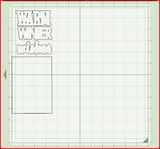
Turn over the 3 1/2" x 12" left over piece to other side and cut out 3 1/2" shadow of Warm Winter Wishes and mat for the verse. Mat is 3 1/2" x 5". Cut 3 1/2" Warm Winter Wishes (not shadow) out of glitter paper. If you don't have WW cart, use any 3 different fonts and cut matching shadows. Adhere words to shadows.


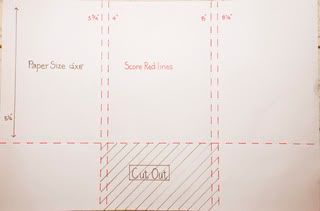
Score along the 12" edge at 3 3/4, 4, 8 & 8 1/4. Turn paper and score at 5 1/2". If cutting by hand, cut out the area between the 3 3/4 & 8 1/4 & 5 1/2 score lines. See picture. Crease all folds and create flaps of the pocket.Cut 2 - 2" bookplates, Shift, shadow #14 using Fabulous Finds. Use a size and shape to fit your stamps. Stamp bookplates and adhere to flaps with brads. Adhere thin tape to the 4 outside edges of the flaps.

Cut 18" of ribbon. Cut slits from 2 1/4" to 2 1/2" on the 3 3/4" & 8 1/4" score lines. Thread ribbon through slits so that the ribbon shows on the inside covering the middle panel. Adhere mat in the middle panel over the ribbon.Tie the ribbon in a bow on the front of the card. Adhere Warm above the ribbon and Winter & Wishes below. Cut out image for the inside right flap - something that matches the paper. Fill the pockets with goodies. A mini glue dot will hold the candy cane in place. Maybe add a Scratch 'n Win ticket!

***Leave a comment and I will email the cut file and pdf file of the verse.

MERRY CHRISTMAS
 

lawsuit loans